Remix - Firebase Authentication (Part 2)
- Part 1 - Getting started with Remix
- Part 2 - Adding Firebase Authentication ← you are here
- Part 3 - Adding Firestore Access
- Part 4 - Deploying to Google App Engine
- Bonus! Part 5 - Deploying to Vercel
Instructions to deploy a Remix application using Firebase and App Engine Vercel. I'll be using vanilla JavaScript, but feel free to implement your solution in TypeScript if you wish. Please also note, I won't be building a full application, but rather exploring the integration of Remix with Firebase as a means to an end. There will be plenty of undeveloped tasks for the reader to complete.
UPDATE (February 10th, 2022): I've created a starter project based on the initial exploration I did in this walkthrough series. You can find my more structured TypeScript implementation on GitHub: https://github.com/nathanhumphrey/remix-app. The repo README provides a high-level overview of the details, and the project comes with some sample impementations.
Create a New Firebase Project #
We'll begin this part of the series by creating a new Firebase project and application. We can then move on to installing Firebase and updating the application routes to use Firebase authentication. It should be fun!
Configure JavaScript SDK support for the client #
Start by creating a new Firebase Project for the application from the Firebase home page. Then, create and connect a new Web app to the project (e.g. Remix App). After making the new web app, you'll be presented with the Firebase configuration settings required for accessing Firebase via the JavaScript SDK. Save the configuration settings in app/firebase.config.js for use on the client.
Note: you can always access Firebase web app setup and configuration info later from the Project settings page of your Firebase project homepage.
// app/firebase.config.js
export const firebaseConfig = {
  apiKey: 'SOME-API-KEY',
  authDomain: 'remix-app-XXXXX.firebaseapp.com',
  projectId: 'remix-app-XXXXX',
  ...
};
For development purposes, we'll update our application to use a demo project. Demo Firebase projects will only interact with Emulators, thus preventing us from making mistaken requests to production services and incurring unforeseen expenses. Thankfully, creating a demo project is easy! Just prefix the projectId in the firebaseConfig file with demo-:
// app/firebase.config.js
export const firebaseConfig = {
  ...
  projectId: 'demo-remix-app-XXXXX', // demo- will connect to Emulator
  ...
prefix projectId with demo- for development
Warning: you will have to make sure you remove the demo- prefix before deploying to production. You may want to update your setup to set the project ID based on an environment variable you set in the browser.
Install Firebase CLI Tools #
We will need the Firebase CLI tools for configuring our local setup and access to Firebase resources. Run the following in your project directory:
$ npm i firebase-tools
$ npx firebase login
$ npx firebase projects:list
# should see the project you created above listed here
installing firebase-tools
Initialize the firebase project #
Now that we have the tools installed, run the following command from your project directory:
npx firebase init
Choose Emulators for now (you can always install additional features by running the command in the future).
Warning: if an emulator is not configured and running, the live service will be accessed, which may result in unexpected charges. Working with demo projects can help guard against this; unsuccessful attempts at accessing the emulator will fail if the service isn't yet added.
Choose Use an existing project and select the project you created above. Then choose to set up the Authentication Emulator for now. Keep the default port number (9099). Finally, enable the Emulator UI and leave the default (any available) port option.
Download the Emulators, and installation of the tools is complete. We just have to configure our Emulators to work with our demo project. Update the newly created .firebaserc to match the change you made above in firebase.js:
// app/.firebaserc
{
  "projects": {
    "production": "remix-app-XXXXX",
    "development": "demo-remix-app-XXXXX"
  }
}
.firebaserc updated to match demo project setting
I like to keep a separate entry for my development project, so I made the updates you see in the file above.
Note: you can update any emulator configuration options set during the initialization in the firebase.json file.
Install Firebase and configure the Emulator #
Install Firebase SDK for the project. Run the following in your project directory:
npm i firebase
Then start your emulators:
npx firebase emulators:start --project development --only auth
You should see a message in the terminal stating that all your emulators are running (we only have one for now). Running the command should also provide a URL to view the Emulator UI. Now that the emulator is running, open the Emulator UI, and let's create a user!
Note: every time you stop/start the emulator, you will lose any user accounts that have been created. You might want to create a script to run in the terminal that can quickly create any users for you in the future.
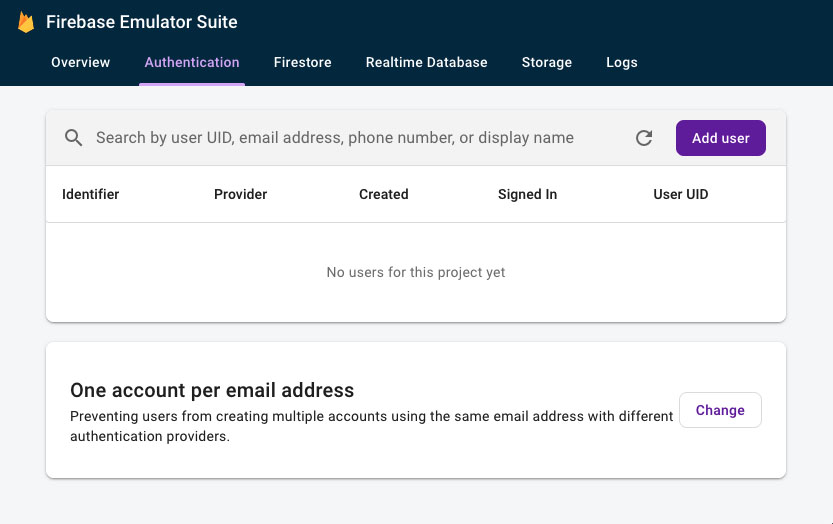
Firebase Emulator UI
Setup basic email/password authentication #
Using the Emulator UI, create a new admin user for the app. Click the Authentication option in the top main navigation bar and click the Add User button (you should see it near the top right of the page).
Use display name = Admin, custom claims = {"role":"admin"}, email = [email protected], and choose whatever password you like. You can skip the photo URL and phone auth options).
You now have a user account that can be used to test authentication for the app.
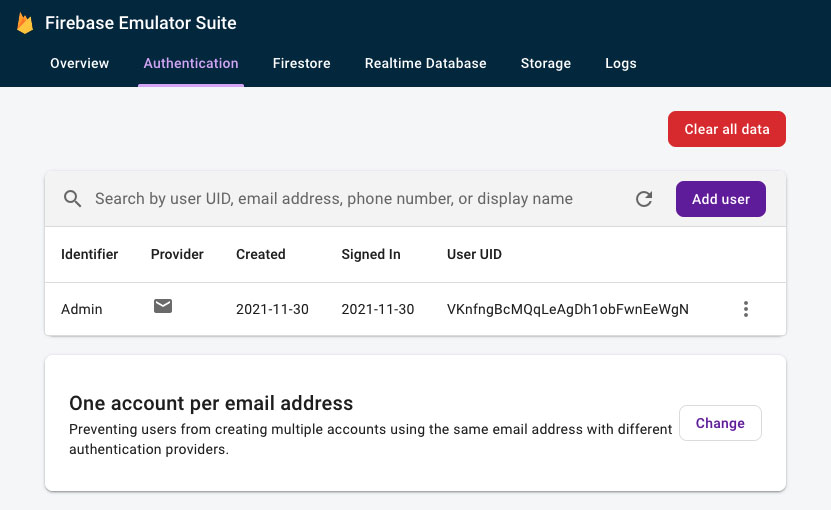
Firebase Emulator UI with new user
Install and initialize Firebase Admin SDK #
Before we can get started building our server-side auth solution, we need to install and configure Firebase Admin.
npm install firebase-admin
Once you've installed the SDK, you need to perform a few additional steps to initialize it. As stated on the Firebase Admin SDK setup page, you will need a private service account key to authorize access to Firebase services. Follow the directions on the Admin SDK setup page, and save your key file somewhere safe on your machine.
Warning: never expose this file in your app. Ensure that it is only loaded/used server-side and watch for module side-effects that may accidentally expose it.
Once done, you will need to export a GOOGLE_APPLICATION_CREDENTIALS environment variable that will hold the file's location. Later, when initializing the app in production, you can use the applicationDefault() function to set the credential option for initializeApp() (we'll set this up in a few steps).
Note: I like to create an env.sh script that exports all the environment variables I'll use. Just add your export VAR=VALUE statements in the file and run $ . env.sh in your terminal to export the variables. Of course, you can always just run the command in your terminal.
# create set-env.sh
touch env.sh
# export the variable
echo "export GOOGLE_APPLICATION_CREDENTIALS=\"/path/to/service-account-file.json\"" >> env.sh
# run the script
. env.sh
configure the credential environment variable
Configure Admin SDK support for the server #
We need to create a Firebase initialization file for access in the backend (Firebase Admin access). Create a new file called firebase.js in the project app/ directory. We will use this file to provide access to Firebase Admin. We will also export the Firebase Admin auth object for use later.
// app/firebase.js
import {
  initializeApp,
  applicationDefault,
  getApps,
  getApp,
} from 'firebase-admin/app';
import { getAuth } from 'firebase-admin/auth';

let app;
let auth;

if (process.env.NODE_ENV === 'development') {
  app =
    getApps().length === 0
      ? initializeApp({
          projectId: 'demo-remix-app-XXXXX',
        })
      : getApp();

  auth = getAuth();
} else {
  app =
    getApps().length === 0
      ? initializeApp({
          credential: applicationDefault(),
        })
      : getApp();
  auth = getAuth();
}

export { app, auth };
firebase.js config file for the project
There are a few things going on in this file. First, we import the necessary packages for initializing the app. The first two from firebase-admin/app will initialize the app, with initializeApp doing the initializing and applicationDefault being used (as stated above) a way to configure access to Firebase based on our credentials. The remaining imports (getApps and getApp) will handle cases where we might try to initialize the app more than once. Finally, we import getAuth from firebase-admin/auth to handle all our auth functionality later.
The next part of the file will initialize the app based on whether we are running in development or production mode. We want to connect the app to our Emulator for development, not Firebase. For production, we use applicationDefault() to connect to Firebase. The additional checks ensure we don't initialize the app more than once. At the end, we export the app and auth.
At this point, if you don't already have the dev server up and running, execute the dev script in your terminal to start it up. Next, open your browser and navigate to the dev server URL. You should now see the Remix app running, ready for us to begin our implementation of Firebase Auth.
npm run dev
Create session utility helper #
Create a file for user session management. You can add all kinds of functionality for managing your users, but we'll keep it simple. Our session helper will have to do the following:
- login user
- logout user
- retrieve the current user
Create the session.server.js file in a new app/util/ directory. The benefit of decoupling the session helper functions from the firebase file is that we can easily swap the implementation to something else, as long as the function signatures remain the same. We'll start by incrementally adding functions and testing them in the app. Let's start by importing what we need to work with session cookie storage from Remix.
// app/util/session.server.js
import { createCookieSessionStorage } from 'remix';

const sessionSecret = process.env.SESSION_SECRET;
if (!sessionSecret) {
  throw new Error('SESSION_SECRET must be set');
}

let { getSession, commitSession, destroySession } = createCookieSessionStorage({
  cookie: {
    name: '__session',
    secure: true,
    secrets: [sessionSecret],
    sameSite: 'lax', // to help with CSRF
    path: '/',
    maxAge: 60 * 60 * 24 * 5, // 5 days
    httpOnly: true,
  },
});

export { getSession, commitSession, destroySession };
session helper
As you can see, we have a check for a sessionSecret that will be used to secure our cookies. First, add an export line to the env.sh file from earlier to export a session secret value. Then export the variable.
# export the variable
echo "export SESSION_SECRET=\"s3cret\"" >> env.sh
. env.sh
export the session secret
Okay, let's get our session file imported somewhere to see how we're doing. We're going to need session access on the /index route because that's where we're going to login our users. Let's begin the transformation of the index.jsx file for login!
Prepare for Login #
Now we can begin the arduous task of updating the index route to support user login. The route will implement a form that the user can use to login. When the form is submitted, we'll sign the user in using Firebase, then send the idToken to our server to create a session. The app will redirect the user to the /secrets route if everything goes well. If there are any errors, the user will remain on the page, and the errors will be displayed under the form (basic validation that you can update as you wish).
Note: I'm using the client-side JavaScript SDK for sign-in. Firebase Admin SDK doesn't support signing a user in, but it does support creating an email/password account for a user. If you'd like to implement all user management on the server (good for setting architecture boundaries), you could update this exercise with a server-side call to sign in a user via the Firebase REST API. Using the REST API would allow you to simply submit the email address and password, avoid the form element additions, and separate your UI from the client SDK. The task is left as an exercise for the reader.
// app/routes/index.jsx
import { Form } from 'remix';

export default function Index() {
  return (
    <div className="remix__page">
      <main>
        <h2>Remix Secrets</h2>
        <p>Save all your secret stuff here!</p>
      </main>
      <section>
        <Form method="post">
          <label htmlFor="email">Email:</label>
          <input type="text" id="email" name="email" />
          <br />
          <label htmlFor="email">Password:</label>
          <input type="password" id="password" name="password" />
          <br />
          <button type="submit">Login</button>
        </Form>
      </section>
    </div>
  );
}
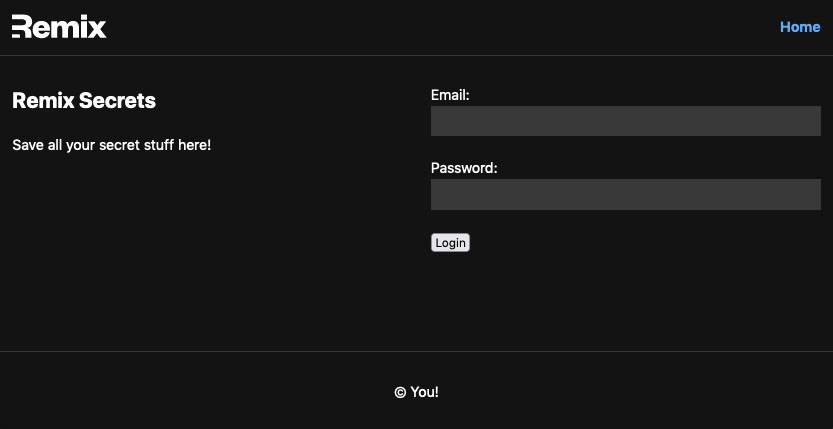
app/routes/index.jsx updated with login form
Add an action function and let's import getSession from session.server:
// app/routes/index.jsx
import { Form } from 'remix';
import { getSession } from '~/util/session.server';

export const action = async () => {
  return await getSession(); // return just for testing at this point
};

export default function Index() {
  return (
    <div className="remix__page">
      <main>
        <h2>Remix Secrets</h2>
        <p>Save all your secret stuff here!</p>
      </main>
      <section>
        <Form method="post">
          <label htmlFor="email">Email:</label>
          <input type="text" id="email" name="email" />
          <br />
          <label htmlFor="email">Password:</label>
          <input type="password" id="password" name="password" />
          <br />
          <button type="submit">Login</button>
        </Form>
      </section>
    </div>
  );
}
app/routes/index.jsx testing session.server import
Note: you might also want to implement some additional CSRF safeguards once you're finished, but that's beyond the scope of this walkthrough.
If all is going well, we shouldn't see any errors in the browser's console or the dev server's terminal. Let's create a function that we can use to create a user session. The function will accept a user object and a location to redirect to. There will be two steps to making this work: 1) creating the session via Remix so we can commit and load the session, and 2) creating the session cookie using Firebase Admin SDK so our session can be verified using Firebase services.
The Firebase documentation is pretty thorough, and there's a page dedicated to working with managing session cookies via Firebase Admin. I won't go into the details that the official documentation covers. We'll just take advantage of the code examples that are available there. Okay, step one, create a get the session and create a commit to it:
// app/util/session.server.js
import { createCookieSessionStorage, json, redirect } from 'remix';

...

export function getUserSession(request) {
  return getSession(request.headers.get('Cookie'));
}

export async function createUserSession(user, redirectTo) {
  try {
    const session = await getSession();
    session.set('idToken', user.idToken);
    session.set('displayName', user.displayName);

    if (redirectTo) {
      return redirect(redirectTo, {
        headers: {
          'Set-Cookie': await commitSession(session),
        },
      });
    } else {
      return json(
        { status: 'success' },
        {
          headers: {
            'Set-Cookie': await commitSession(session),
          },
          status: 201,
        }
      );
    }
  } catch (error) {
    return json(
      {
        errorCode: 'session/create',
        errorMessage: 'Could not create session: ' + error,
      },
      {
        status: 500,
      }
    );
  }
}
app/util/session.server.js - creating a session
The getUserSession() function does just that; it's a helper to retrieve the current session (we will need it in several other functions). The second function, createUserSession(), will do most heavy lifting. For starters, we have the function setting two session variables (idToken and displayName) and then committing the session for a redirect, if one was passed in, or committing the session for a json response. To test these functions, let's add some client-side code in our index route.
// app/routes/index.jsx
import { Form, useLoaderData } from 'remix';
import { getUserSession, createUserSession } from '~/util/session.server';

export const action = async () => {
  return createUserSession({ idToken: '1234', displayName: 'JDoe' });
};

export const loader = async ({ request }) => {
  const session = await getUserSession(request);
  return (await session.get('displayName')) || null;
};

export default function Index() {
  const username = useLoaderData();
  return (
    <div className="remix__page">
      <main>
        <h2>Remix Secrets</h2>
        <p>Save all your secret stuff here!</p>
        {username && <p>Hello, {username}</p>}
      </main>
      ...
app/routes/index.jsx testing session.server import
I've changed the code in the previous action a little to support what we're trying to actually do here. When the form is submitted, the action will return a response after (hopefully) committing the session. Then, the loader should load our session data and return the displayName that has just been set. I retrieve the displayName in the default function and render it in our component if it's present. Give it a try. You should see that in the dev tools' storage panel, we now see our newly created session.
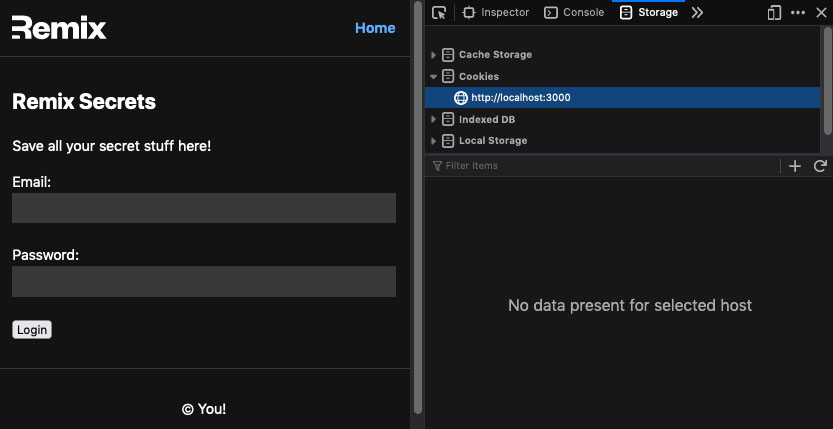
cookie storage prior to submitting the form
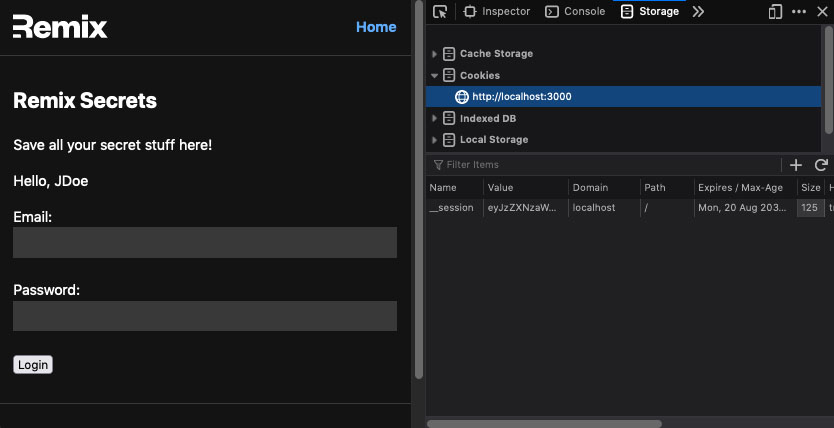
cookie storage and username display after submitting the form
Okay, so far, so good. Now, we need to bring in Firebase to sign in a user. Because we're logging the user in on the client, we will need the Firebase JavaScript SDK for this task. The steps we'll take are as follows:
Note: if you implement Firebase Auth REST API (as mentioned above), you won't need to do any of the following client SDK work.
- import the required JavaScript SDK function (
initializeApp,getAuth,signInWithEmailAndPassword,signOUt, and - for testing -connectAuthEmulator) - create a function to handle the form submission
- initialize the app and get auth
- connect to the emulator (during development testing)
- sign in the user via Firebase
- get the user's idToken
- sign the user out (remember, this is all client-side)
- now that we have the user and idToken, submit both to our action
- in the action, retrieve the idToken and displayName and create the user session
- the user is now 'logged in' to our app
Okay, let's start with the submit handler. Create a handleLogin function in our index component, and create refs for the email and password fields (we need to access them in the handler).
// app/routes/index.jsx
import { useRef } from 'react';
import { Form, useLoaderData, useSubmit } from 'remix';

...

export default function Index() {
  const emailRef = useRef(null);
  const passwordRef = useRef(null);
  const username = useLoaderData();

  const handleLogin = async (evt) => {
    // never submit this initial submit, need to inject idToken and displayName
    evt.preventDefault();
  };

  return (
    <div className="remix__page">
      <main>
        <h2>Remix Secrets</h2>
        <p>Save all your secret stuff here!</p>
        {username && <p>Hello, {username}</p>}
      </main>
      <section>
        <Form method="post" onSubmit={handleLogin}>
          <label htmlFor="email">Email:</label>
          <input
            type="text"
            id="email"
            name="email"
            ref={emailRef} />
          <br />
          <label htmlFor="email">Password:</label>
          <input
            type="password"
            id="password"
            name="password"
            ref={passwordRef}
          />
          ...
app/routes/index.jsx creating the submit handler
Now the form will never submit, so if you clear the session cookie and resubmit the form, no cookie should reappear in the storage panel; this is a good thing. We don't care about sending the email and password to our server. First, we need to get the authenticated user's idToken, and then submit to the server—time to go full Firebase mode. Import the required Firebase functions; let's put them to work in the submit handler.
// app/routes/index.jsx
import { useState, useRef } from 'react';
import { Form, useLoaderData, useSubmit } from 'remix';
import { initializeApp } from 'firebase/app';
import {
  getAuth,
  signInWithEmailAndPassword,
  signOut,
  connectAuthEmulator,
} from 'firebase/auth';
import { firebaseConfig } from '~/firebase.config';

export const action = async ({ request }) => {
  try {
    // Expect ID token and display name
    const body = await request.formData();

    const idToken = body.get('idToken');
    const displayName = body.get('displayName');

    return createUserSession({ idToken, displayName }, '/secrets');
  } catch (error) {
    return json(
      {
        errorCode: 'login/general',
        errorMessage: 'There was a problem loggin in',
      },
      { status: 500 }
    );
  }
};

...

export default function Index() {
  const [error, setError] = useState(null);
  const submit = useSubmit();
  const emailRef = useRef(null);
  const passwordRef = useRef(null);
  const username = useLoaderData();

  const handleLogin = async (evt) => {
    // never submit this initial submit, need to inject idToken and displayName
    evt.preventDefault();
    try {
      initializeApp(firebaseConfig);
      const auth = getAuth();

      // TODO: add an env check for USE_EMULATOR
      // https://remix.run/docs/en/v1.0.6/guides/envvars#browser-environment-variables
      if (!auth.emulatorConfig) {
        connectAuthEmulator(auth, 'http://localhost:9099');
      }

      // sign in
      const { user } = await signInWithEmailAndPassword(
        auth,
        emailRef.current.value,
        passwordRef.current.value
      );

      const idToken = await user.getIdToken();

      // signout client
      await signOut(auth);

      // append the idToken and displayName to the posted form
      const inputToken = document.createElement('input');
      inputToken.setAttribute('type', 'hidden');
      inputToken.setAttribute('name', 'idToken');
      inputToken.setAttribute('value', idToken);
      evt.target.append(inputToken);

      const inputDisplayName = document.createElement('input');
      inputDisplayName.setAttribute('type', 'hidden');
      inputDisplayName.setAttribute('name', 'displayName');
      inputDisplayName.setAttribute('value', user.displayName);
      evt.target.append(inputDisplayName);

      submit(evt.target);
    } catch (error) {
      // prepare the errors for display
      const errors = {};
      errors.errorCode = error.code;
      errors.errorMessage = error.message;
      setError(errors);
    }
  };

  return (
    <div className="remix__page">
      ...
          <button type="submit">Login</button>
          {error?.errorCode && (
            <p>
              <em>Login failed: {error.errorMessage}</em>
            </p>
          )}
        </Form>
      </section>
    </div>
  );
}
app/routes/index.jsx completing the submit handler and action
Whoa! That's a significant update; let's break it down function by function.
action- attempts to retrieve an idToken and displayName from submitted form data and create the user sessionhandleLogin- initializes JavaScript SDK auth (it also connects to the emulator, but you'll want to toggle that based on the environment) and callssignInWithEmailAndPassword(). If the user is authenticated, we can retrieve the idToken and then sign the user out. Remember that the server will create a session for the user, so we don't want to keep the user signed in via the client-side library. Two fields are added to the form (idToken and displayName) before it is resubmitted to the action for processing on the server.Index- added a useSubmit hook for the handler to use, and added state for displaying any encountered errors. There is also a check for error rendering near the end. It's not the prettiest way to display errors, but this is a learning example.
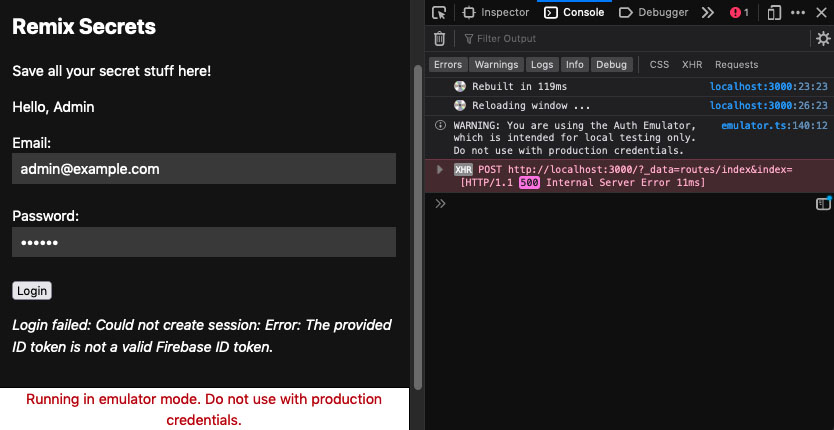
At this point, things should be working reasonably well. You can enter your Emulator user credentials (Admin user) and sign in. You'll know the emulator is running when you see the warning ribbon on the bottom of the browser. But, we have no real way of knowing that the idToken is valid on the server. Right now, our app blindly accepts that it received a tokenId and that it's good to go. Anyone could post an idToken to be logged in. We have to verify the idToken on the server too.

signed in and redirected to the secrets route, but not verified on the server
Note: you should now also see a warning ribbon at the bottom of the browser, letting you know you're running Firebase in emulation mode. The ribbon will only appear when the client has connected to the emulator.
Verify the User on the Server #
The final step to completing the login process is verifying the user server-side. As of now, the createUserSession() function just sets the idToken and displayName its provided and creates a session. That isn't good. First, we should verify that we received a valid idToken from Firebase. The following update to the createUserSession() function will use Firebase to verify the idToken before creating the session:
// app/util/session.server.js
import { auth } from '~/firebase';

...

export async function createUserSession(user, redirectTo) {
  if (!user.idToken || !user.displayName) {
    return json(
      {
        errorCode: 'session/missing-param',
        errorMessage: 'Missing required session params',
      },
      { status: 422 }
    );
  }
  // expires in 5 days
  const expiresIn = 60 * 60 * 24 * 5;
  // Create the session cookie. This will also verify the ID token in the process.
  // The session cookie will have the same claims as the ID token.
  try {
    const sessionIdToken = await auth.createSessionCookie(user.idToken, {
      expiresIn,
    });
    const session = await getSession();
    session.set('sessionIdToken', sessionIdToken); // update to sessionIdToken
    session.set('displayName', user.displayName);
    ...
verify the idToken before creating the session
If something were to go wrong during the verification step, an error would bring the whole thing to a stop. We can test this functionality by repeating the login process. Delete the session cookie in the dev tools panel, return to the index route, and login again to update the session cookie.
We should also make an update to handle any errors that may occur during the action processing. Update the index route component to use action data (to check for returned errors) and then add an update to render any action errors to the UI. You can test the whole thing by hardcoding a random string for the idToken in the auth.createSessionCookie() call in session.server.js (just be sure to undo the change after testing).
// app/routes/index.jsx
import { Form, useActionData, useLoaderData, useSubmit } from 'remix';

...

export default function Index() {
  const actionError = useActionData();

  ...

  return (

        ...

          {error?.errorCode && (
            <p>
              <em>Login failed: {error.errorMessage}</em>
            </p>
          )}
          {actionError?.errorCode && (
            <p>
              <em>Login failed: {actionError.errorMessage}</em>
            </p>
          )}
        </Form>
      ...
checking and rendering action errors
checking and rendering action errors
In our example, I chose to copy the render for handleLogin errors, but you might want to do something different for action errors.
Personalize and Protect From Unauthorized Access #
Now that we can verify our session let's protect the /secrets route by adding a session check. We'll add a session helper function to require a user in the session. Make the following addition to session.server.js:
// app/util/session.server.js

...

export async function requireUser(
  request,
  redirectTo = new URL(request.url).pathname
) {
  const session = await getUserSession(request);
  const tokenId = session.get('sessionIdToken');

  if (!tokenId || typeof tokenId !== 'string') {
    const searchParams = new URLSearchParams([['redirectTo', redirectTo]]);
    throw redirect(`/?${searchParams}`);
  }

  try {
    const decodedClaims = await auth.verifySessionCookie(tokenId);
    return decodedClaims;
  } catch (error) {
    const searchParams = new URLSearchParams([['redirectTo', redirectTo]]);
    throw redirect(`/?${searchParams}`);
  }
}
adding a function to check for a user in the session
Note: you might also want to add a `getUserName()` function in the session helper to return the displayName. You could use a function to retrieve the user name for display in other routes or set a value in a context for the app.
The requireUser() function will check for a valid session cookie by using Firebase auth (auth.verifySessionCookie()). Suppose the session contains a sessionIdToken, and it is verified. In that case, we receive the decoded claims object, which contains the user that has been verified. If something goes wrong, an error will bring everything to a stop, and the app will redirect to the index route.
We can put this function in the loader for any routes that we want to be protected. Open the secrets.jsx file and add the necessary protection code:
// app/routes/secrets.jsx
import { requireUser } from '~/util/session.server';

...

export const loader = async ({ request }) => {
  return await requireUser(request, '/');
};

export default function Secrets() {
  ...
protecting the /secrets route
Note: we won't need to add this check at any other nested secrets routes (if we had them) since they would all render in the /<Outlet /> component of the top-level `/secrets` route.
To start fresh, delete the session cookie through the dev tools and access the /secrets route directly. You should be redirected back to the index page. Success! Now, let's login with our admin account, and we should be redirected to the /secrets route with access. Give it a try.
Now that we've protected the route let's add some personalization to the page. We receive the decoded claims if the auth check is successful, so we can useLoaderData() to access the claims in our component. Let's render the user's name as a test:
// app/routes/secrets.jsx
import { useLoaderData } from 'remix';

...

export default function Secrets() {
  const user = useLoaderData();

  return (
    <div className="remix__page">
      <main>
        <h2>Remix Secrets</h2>
        <p>Hello {user.name}, your secrets will appear here.</p>
      </main>
    </div>
  );
}
protecting the /secrets route
Note: you can console.log(user) as well to see what's returned in from the action in the console.
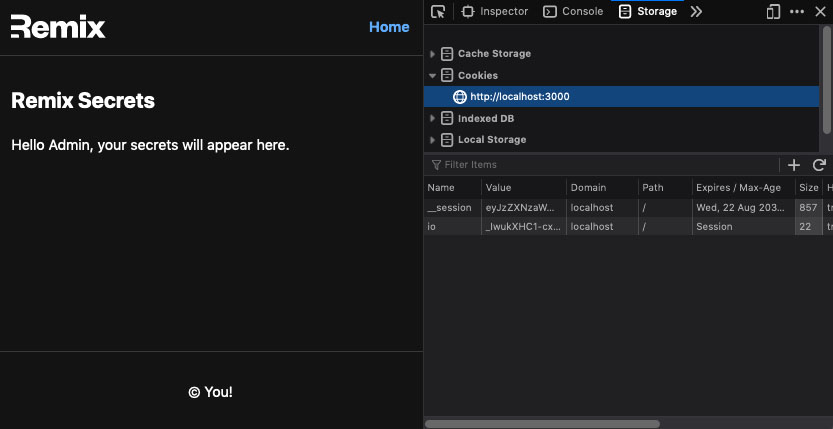
logged in and rendering the user name
Time for Logout #
All we have left to do now is provide the user with a way to logout. Next, we need to add a function that can destroy the session. Add the following update to our session helper file.
// app/util/session.server.js

...

export async function destroyUserSession(request, redirectTo) {
  const session = await getSession(request.headers.get('Cookie'));
  return redirect(redirectTo, {
    headers: {
      'Set-Cookie': await destroySession(session),
    },
  });
}
destroying the session will remove all data associated with the session variable
We can now also use the new destroyUserSession() function in our requireUser() function, in the case something goes wrong with verification of the session cookie:
// app/util/session.server.js

...

export async function requireUser(
  request,
  redirectTo = new URL(request.url).pathname
) {

  ...

  try {
    const decodedClaims = await auth.verifySessionCookie(tokenId);
    return decodedClaims;
  } catch (error) {
    destroyUserSession(request, '/');
  }
}
With a means to end the session ready, create logout.jsx in the app/routes directory to logout the user we just logged in. In this route, we're not going to do much: attempt to logout the user and redirect back to the index. There's no reason to display anything to the user for this route, so we'll only include action and loader functions.
// app/routes/logout.jsx
import { redirect } from 'remix';
import { destroyUserSession } from '~/util/session.server';

export const loader = async () => {
  // not expecting direct access, so redirect away
  return redirect('/');
};

export const action = async ({ request }) => {
  return destroyUserSession(request, '/');
};
logout.jsx route will logout and then redirect
As stated above, the logout route won't render anything. We'll just logout the user and redirect them back to the index. Okay, now back to the secrets route to implement a means to logout for the user. We'll use a form to post to our new logout action:
// app/routes/secrets.jsx
import { Form, redirect, useLoaderData } from 'remix';

...

export default function Secrets() {

  ...

  return (
    <div className="remix__page">
      <main>
        <h2>Remix Secrets</h2>
        <p>Hello {user.name}, your secrets will appear here.</p>
        <Form method="post" action="/logout">
          <button>Logout</button>
        </Form>
      </main>
    </div>
  );
}
app/routes/secrets.jsx updated with logout link
Click the Logout button, and you should be redirected to the index route. Also, check the session cookie and notice that the data has been destroyed (it will still appear, there just won't be a value associated with it). If a user tries to access the /secret route directly, they will be redirected to the index route if they are not logged in.
Let's add one final update to the index route so that it redirects back to the secrets route if the user were to navigate there. So essentially, when a user is logged in, their home page is the secrets page. You can remove the useLoaderData and username parts now that we won't be staying on this page if the user is logged in.
// app/routes/index.jsx
import { Form, redirect, useActionData, useSubmit } from 'remix';

...

export const loader = () => {
  const session = await getUserSession(request);
  return (await session.get('displayName')) ? redirect('/secrets') : null;
};

...
the index route will now redirect to secrets if the user is logged in
Summary #
That's it! We've successfully configured our Remix app to work with Firebase, specifically Firebase Auth. We then implemented session helper functions on the routes to grant users the ability to log in and log out and protect any desired routes from unauthorized access. Next, we'll allow our user to save secrets to a database using Firestore!
References #
- Remix Docs - Sessions
https://remix.run/docs/en/v1/api/remix#sessions - Remix Docs - Initializing Browser Only APIs
https://remix.run/docs/en/v1/other-api/constraints#initializing-browser-only-apis - Add Firebase to Your JavaScript Project
https://firebase.google.com/docs/web/setup - Firebase Auth Emulator
https://firebase.google.com/docs/emulator-suite/connect_auth#web-version-9 - Firebase Web Password Authentication
https://firebase.google.com/docs/auth/web/password-auth - Firebase Admin - Install and Initialize
https://firebase.google.com/docs/admin/setup#initialize-sdk - Firebase Admin - Verify Tokens
https://firebase.google.com/docs/auth/admin/verify-id-tokens