Remix - Deploying to Vercel (Part 5)
- Part 1 - Getting started with Remix
- Part 2 - Adding Firebase Authentication
- Part 3 - Adding Firestore Access
- Part 4 - Deploying to Google App Engine
- Bonus! Part 5 - Deploying to Vercel ← you are here
Instructions to deploy a Remix application using Firebase and App Engine Vercel. I'll be using vanilla JavaScript, but feel free to implement your solution in TypeScript if you wish. Please also note, I won't be building a full application, but rather exploring the integration of Remix with Firebase as a means to an end. There will be plenty of undeveloped tasks for the reader to complete.
UPDATE (February 10th, 2022): I've created a starter project based on the initial exploration I did in this walkthrough series. You can find my more structured TypeScript implementation on GitHub: https://github.com/nathanhumphrey/remix-app. The repo README provides a high-level overview of the details, and the project comes with some sample impementations.
Ship it! #
Okay, we've made it to the final part of this Remix series: deployment. Remix comes with many ready-to-ship options for several hosting platforms or services. I chose Vercel for deployment today, but the application should be deployable to any platform or host that supports Node applications.
Vercel Remix Deployment #
Okay, Vercel can publish your application from several Git locations or directly from the terminal. However, I want to work through this project as a standalone exercise, meaning I don't want to go through the trouble of creating a Git repo. So, terminal deployment it is? You can read more online about So, terminal deployment it is? You can read more online about Vercel's CLI deployment.
Install the Vercel CLI tools:
npm i vercel
All right, having never used Vercel, or even skimmed the documentation, this should be an interesting post. I intend to record my steps as I go through them, mishaps and all. In the summary, I'll distill the adventure into a nice shortlist of required steps that one must complete to get their application deployed via Vercel quickly. Let's go!
Create a Vercel project #
At this point, all I've done is install the vercel package. I haven't signed up, made an account, created a project or anything. Maybe I should read the docs. Starting at the beginning, the projects page states that I must first create a project to begin, . So let's do that. The new project page says that I must import a Git project or use one of their templates; there is no option for cli upload or anything. Okay, let's try a template (maybe we can overwrite it later).
It's a trap! Select the Remix template option and then be shown a screen that informs you of the need to sign in (I'll use my GitHub account, fine) and then scroll down a little to see the following:
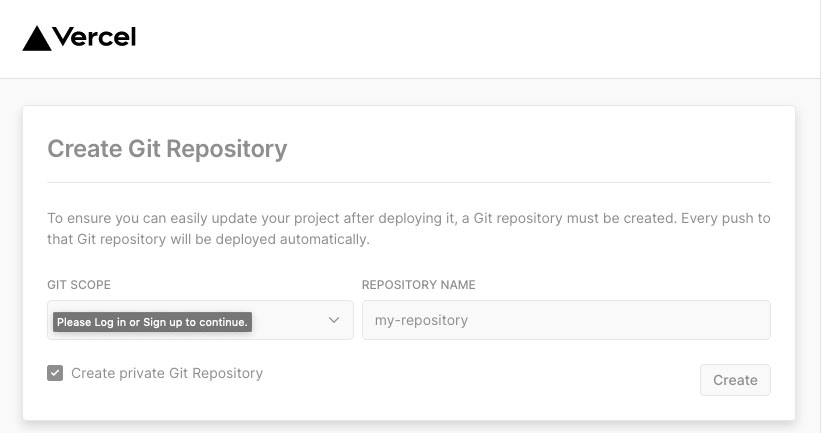
Vercel requires git
Okay, you got me. I signed into my GitHub account, created a repository (I don't want to grant Vercel access to all and future repositories), and then continued.
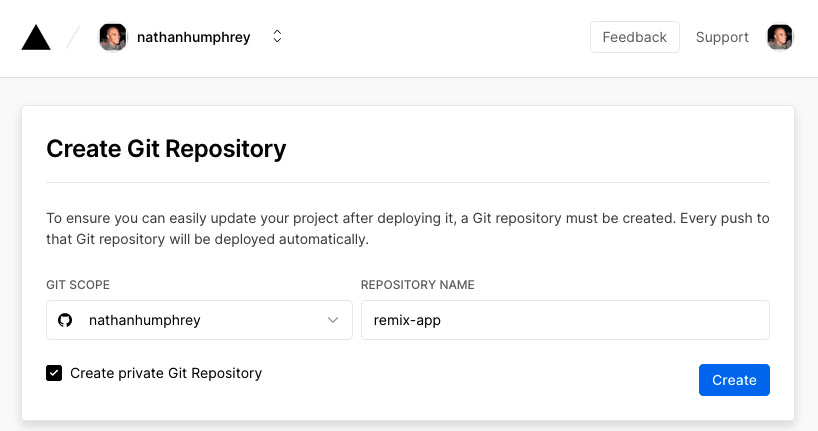
Vercel requires git
Noooo! There's no way to use an existing repo you have to create one. I hate granting access to third-party apps/providers, but I'll make the exception to continue.
It looks like Vercel created the "getting started" Remix app and pushed it into my new remix-app repository. Okay, time to overwrite with the application I've already created. The Remix site states that deployment targets can be changed by running the create app script, choosing the desired deployment target, and then copying over your application code. Since Vercel pretty much took care of steps one and two, I'm going to clone my new repo, copy over the code we've created thus far, and then push to the main branch, just to see what happens. I'll work on the Firebase configuration later. I just want to see what happens with the copy over first.
Copy and pray #
The newly created project comes as advertised, with a few different files specific to Vercel. My one concern was with the package.json, but it's the same as what I started with, minus the Firebase additions. The .gitignore file is slightly different, accounting for Vercel's specific requirements for the build directories, so I will make manual updates to that file rather than overwrite it. Everything has been edited or copied over, so now it's time to deploy. I added my files, committed my changes, and pushed to main. Now what?
Note: you may be wondering, "what happened to the vercel cli tools you downloaded?". Well, that was back in the "old" project directory. Now I'm working on this Vercel created project, so I'm just going to follow their directions and push to main. I edited out the vercel dependency from my package.json file.
Failed! #
Well, the first deployment failed, as expected (I haven't configured Firebase access yet). I was greeted with the following when attempting to access the site:
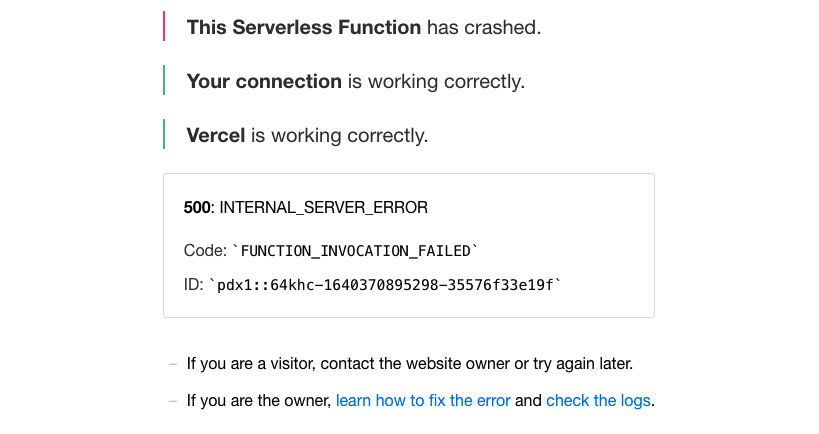
first deploy fails, as expected
Let's look at the logs, and maybe they're more helpful than the messages I received in App Engine.
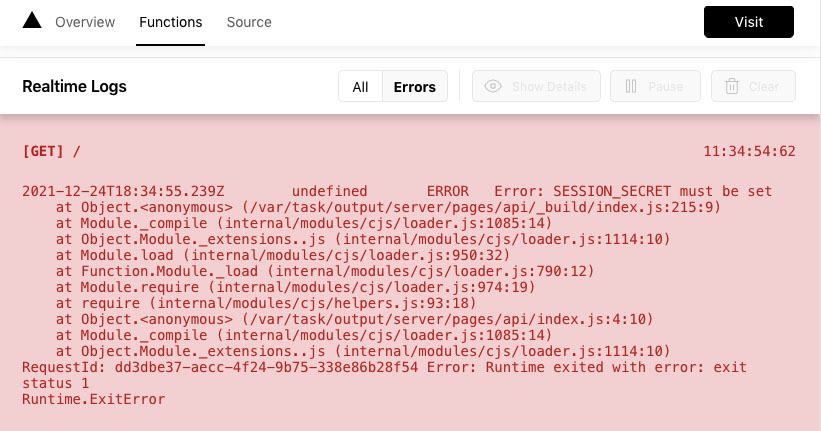
first deploy error message, missing the session env variable
An informative message! Okay, I'm going to have to make some updates. First, add the required environment variables for the application and update the current service account file for Firebase Admin SDK to be loaded via an environment variable.
Note: there's no way to securely upload the service account file (I don't want to commit it to Git). Hacking the file into an environment variable is one way of managing the credentials.
I used the project settings page to add the required environment variables:
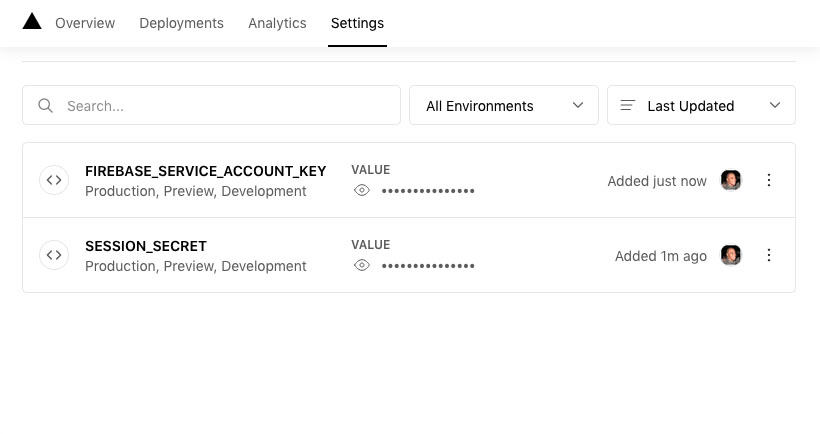
added required env variable
Before I explain the FIREBASE_SERVICE_ACCOUNT_KEY implementation, let's see what happens now that the SESSION_SECRET has been created. Redeploy the application. You will see a notice that the same code is being used (I haven't pushed anything to GitHub) but the project configuration settings will be updated. I assume this includes environment variables. We'll see.
Success!! The app is running live on Vercel! That's further than I got with App Engine and in less time (especially considering I'm new to Vercel). Okay, time to update my code to make use of the Firebase service environment variable and set up the required Firebase services.
app is running live on Vercel
Pull Firebase Key from the Environment #
If I try logging in with my Admin account I see the following:
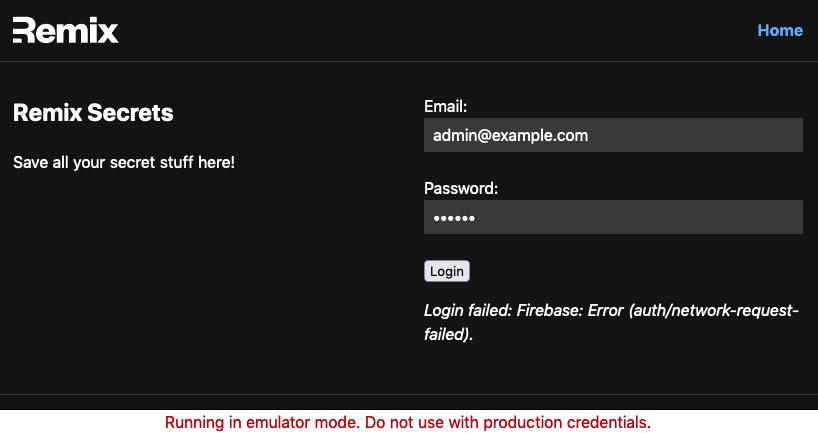
app is still trying to connect to the emulator
Okay, now make the necessary changes to detect development vs. production from the client. I can add some code in the index route loader to detect the environment. Open up the index route and add some code to load the environment from the server.
// app/index.js
import { useState, useRef } from 'react';
import { Form, redirect, useActionData, useLoaderData, useSubmit } from 'remix';

...

export const loader = async ({ request }) => {
  const dev = process.env.NODE_ENV === 'development';
  const session = await getUserSession(request);
  return (await session.get('displayName'))
    ? redirect('/secrets')
    : { isDev: dev };
};

...

export default function Index() {
  const { isDev } = useLoaderData();

  ...

  const handleLogin = async (evt) => {
    evt.preventDefault();
    try {
      initializeApp(firebaseConfig);
      const auth = getAuth();

      if (isDev && !auth.emulatorConfig) {
        connectAuthEmulator(auth, 'http://localhost:9099');
      }

      ...
updating the index route to check for development environment
I then need to update the client Firebase config for development vs. production detection:
// app/firebase.config.js
let id;

if (process.env.NODE_ENV === 'development') {
  id = 'demo-remix-app-XXXXX';
} else {
  id = 'remix-app-XXXXX';
}

export const firebaseConfig = {
  apiKey: 'AIzaSyCd3FosGAPPHFX1lLYoXciB5t5PN8ec9kg',
  authDomain: 'remix-app-XXXXX.firebaseapp.com',
  projectId: id,
  storageBucket: 'remix-app-XXXXX.appspot.com',
  messagingSenderId: '631701105591',
  appId: '1:631701105591:web:27c60d4440532495cf9632',
};
update firebase.config.js for deployment
When the application is built, the production id remix-app-XXXXX will be configured as a variable for the configuration, thanks Remix!
Now to test the app locally. Build the app:
npm build
Then start the app in production mode:
npm start
When attempting login, I see the following:
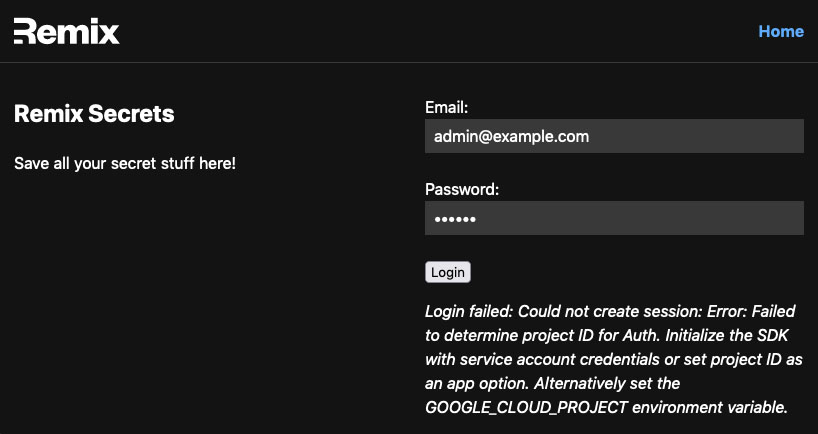
app is now trying to connect to Firebase
Excellent. Time to update the credentials to connect to Firebase, as the error message states, and then enable the services via the Firebase console. Almost there. First, I tried the "setting GOOGLE_CLOUD_PROJECT environment variable" approach to see what happens. No good, as I expected. Now to use the service account variable I set up earlier in Vercel. I'll make the necessary changes to the code to load the key from the environment and test it locally first.
Time to export the FIREBASE_SERVICE_ACCOUNT_KEY environment variable I was referring to earlier. I'll unset the previously defined GOOGLE_APPLICATION_CREDENTIALS variable and set the FIREBASE_SERVICE_ACCOUNT_KEY. Since I can no longer reference a file path location, I'm "hacking" the file contents as JSON into the environment variable. I removed all line breaks so the entire file is now on one line and then copied and pasted the text as the value for my new environment variable. Leave the \n linebreak characters in the private key value; be sure to repeat this process for the environment variable in Vercel. To load the variable now requires some code to access the process.env object. Update the firebase.js file to pull the credentials from the environment variable:
Note: if you find that your changes have no effect, be sure to check that you've rebuilt and restarted the application. Changes to the source are not automatically built into the application unless you're running the dev server.
// app/firebase.js
import { cert, initializeApp, getApps, getApp } from 'firebase-admin/app';

...

if (process.env.NODE_ENV === 'development') {
  ...
} else {
  const serviceAccount = JSON.parse(process.env.FIREBASE_SERVICE_ACCOUNT_KEY);
  app =
    getApps().length === 0
      ? initializeApp({ credential: cert(serviceAccount) })
      : getApp();
  ...
updated firebase.js to load credentials from the environment
With these changes made, I rebuilt the app, and restarted the production build, and hoped for the best:
firebase production auth now working locally
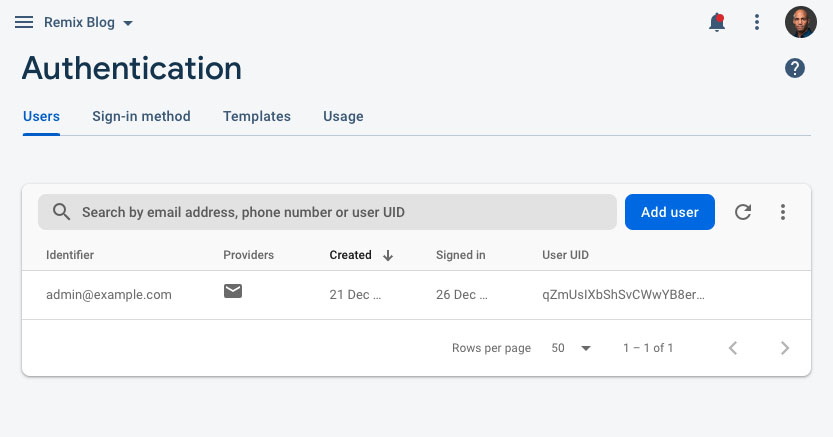
firebase console showing the recent sign in
Success. My app is now authenticating against my production Firebase users, but it's still loading data from the Firestore emulator — no big deal. I will add, commit, and push the changes I've made to Vercel to see if the same holds true from the cloud. Once I've confirmed that the app authenticates from Vercel in production, I'll make the updates to read from Firestore.
After redeploying my latest changes, running the app on Vercel now yields:
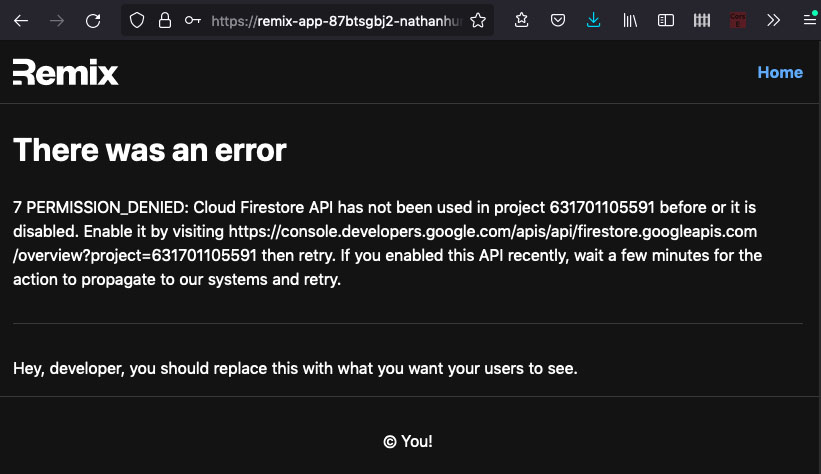
firebase production auth now working from Vercel
Which, at first, looks terrible, but is good! Sign-in was successful, but as I stated above, I haven't yet configured Firestore for access; that's why we're seeing this message. From here, I need to enable Firestore and create the first document for access (as I did for the Firestore Emulator). Access should already be granted via the credentials we're already using.
Note: if you haven't modified your code from what I provided earlier for Firestore access, be sure to use the same hard-coded document id you did from the Emulator. Otherwise, this read from Firestore will fail.
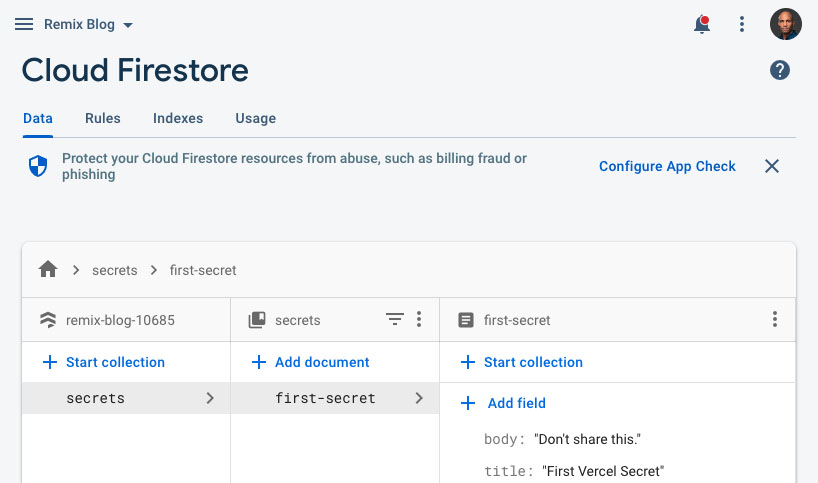
firestore production first document
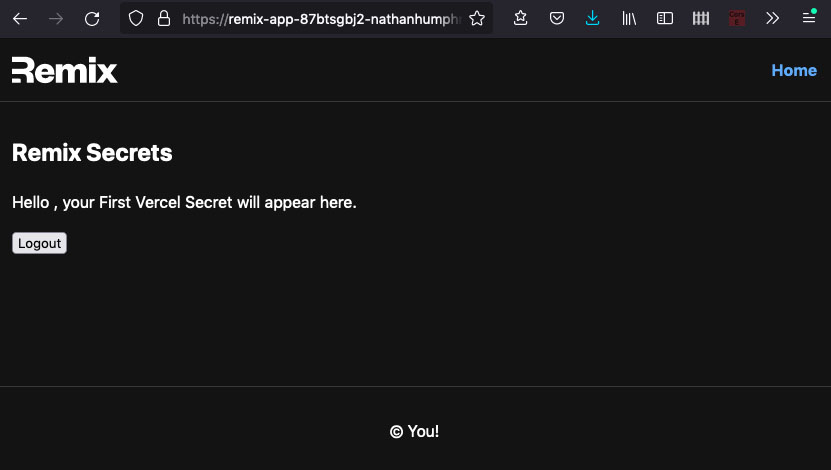
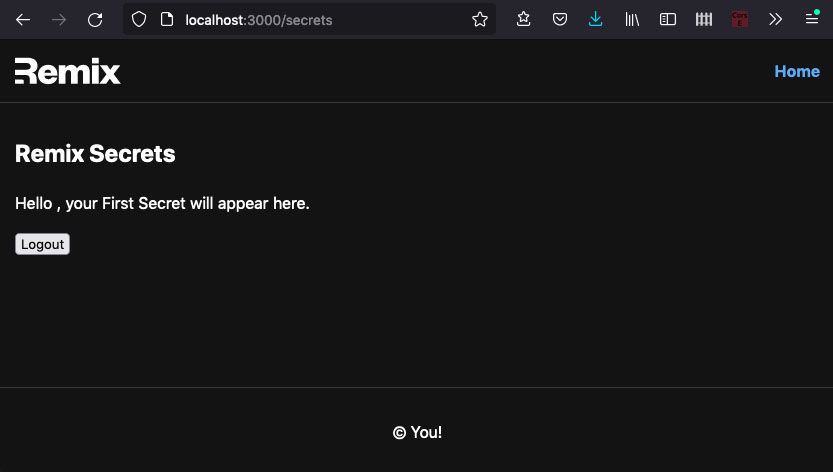
reading first firestore document from Vercel
Note: you'll notice that the display name isn't showing up, and that's because you can't set that property when creating a user via the Firebase console. You'll have to create/update your user sign-up process to create one for your user(s).
And there we have it! From nothing to a Remix with Firebase/Firestore application deployed on Vercel.
Summary #
To quickly recap, I had to complete the following to get the Remix app with Firebase deployed to production:
- Create a Vercel account and project
- Create an environment variable to hold the Firebase service account key
- Update the application to use the environment variable for production Firebase initialization
- Ensure that the required Firebase services are enabled
And, really, that was it. Pretty simple. If I were to start this process over, I would begin with the Vercel project creation and then clone and begin work in the Git repository.
Throughout my Remix with Firebase series, I've left a lot of additional tasks for you, the reader, to explore and complete. I hope the walkthrough serves as a good base for you to continue your Remix application development and that you can go on to build something incredible.
References #
- Remix Deployment
https://remix.run/docs/en/v1.0.6/guides/deployment - Remix - Browser Environment Variables
https://remix.run/docs/en/v1.0.6/guides/envvars#browser-environment-variables - Vercel
https://vercel.com - Vercel - Deployments
https://vercel.com/docs/concepts/deployments/overview